DTF Transfer Size Guide: How to Pick the Right Size
Choosing the right size is the difference between a DTF transfer that looks custom made and one that looks lost on the shirt. Too small and a full-front design looks like an afterthought. Too big and it wraps into the armpits or swallows a youth shirt. This guide gives you a practical DTF transfer size chart for the most common print spots, shows you how to measure, and explains what to send so your transfers come out sharp.
We make our own DTF transfers at Cre8tee, with a max print width of 10.5 inches, so every size in this guide is planned to fit that limit.
Quick DTF transfer size chart
These are common starting points used across the apparel industry. They are general guidance, not fixed rules. Always hold a printed paper mockup against the actual garment before you order.
| Print location | Typical width | Notes |
|---|---|---|
| Left chest logo | 1 to 4 in | The most common business and team placement |
| Full front, adult | 9 to 10.5 in | Scale down for slim fits and women's cuts |
| Full front, youth | 7 to 9 in | Measure the smallest youth size in your order |
| Full back, adult | 10 to 10.5 in | Can run taller than the front |
| Upper back or yoke | 8 to 10.5 in wide, 2 to 4 in tall | Good spot for a name or website |
| Sleeve | 2.5 to 3.5 in | Short sleeves have less room than long sleeves |
| Hat front | 2 to 4.5 in wide, 2 to 2.5 in tall | Depends on crown shape and seam |
| Pocket or tote corner | 3 to 4 in | Keep away from seams |
Standard sizes we offer
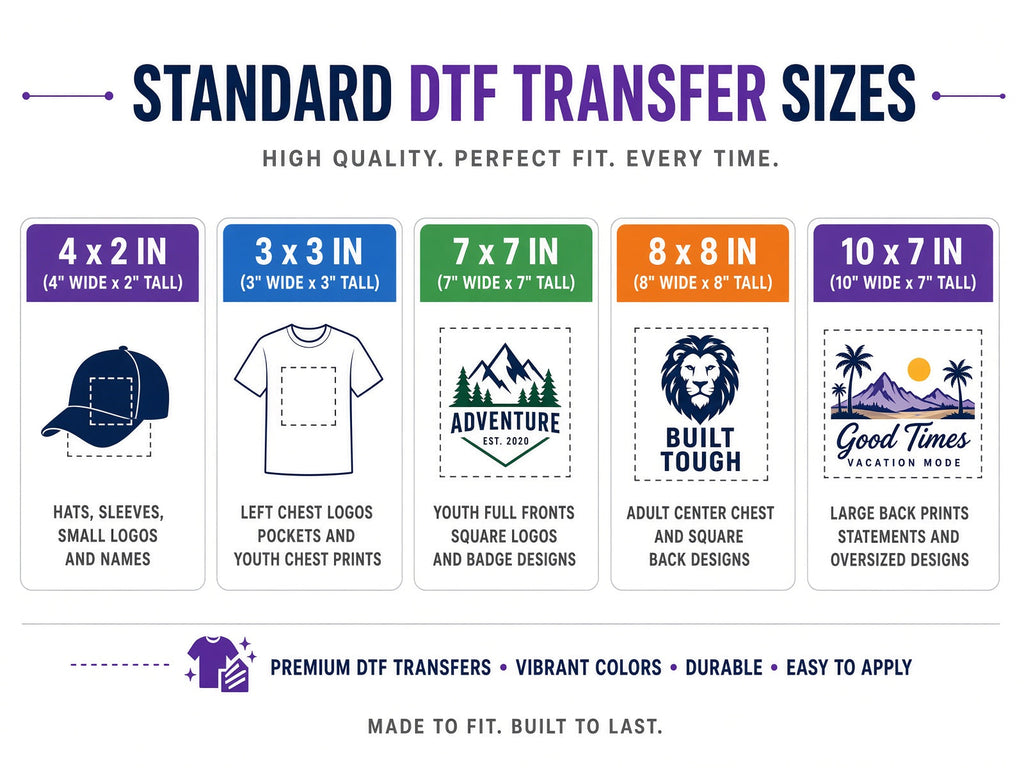
Our standard DTF transfer sizes are:
- 4 x 2 in: hats, sleeves, small logos and names.
- 5 x 4 in: pockets, youth chest prints and other small placements.
- 7 x 7 in: youth full fronts, square logos and badge designs.
- 8 x 8 in: adult center chest and square back designs.
Need something else? Custom sizes work as long as the width is 10.5 inches or less. Tell us the size you want when you order on our DTF transfers page.
How to measure for the right size
- Lay the garment flat and smooth it out. Use the size that appears most in your order, or the smallest if you are using one transfer size for every shirt.
- Measure the print area. For a full front, measure from just below the collar seam down about 3 to 4 inches, then across the chest between the side seams. Leave at least 2 to 3 inches of space on each side.
- Check height, not just width. A tall design can run into the belly area. On most adult shirts, a full-front print taller than about 12 inches looks oversized.
- Print a paper mockup. Print your art at actual size on regular paper, cut it out and lay it on the shirt. It takes two minutes and catches most size mistakes.
Adult vs youth sizing
A design that looks great on an adult large can overwhelm a youth small. If your order mixes youth and adult shirts, you have two choices: order two transfer sizes, or pick one size that works on the smallest shirt. For team and school orders, two sizes usually look best. A common pairing is a 10 to 10.5 inch transfer for adults and a 7 to 8 inch transfer for youth.
Hats, sleeves and other small spots
Small placements have less forgiveness. On hats, the crown curve and center seam limit the flat area, so keep designs simple and around 2 to 2.5 inches tall. On sleeves, keep artwork to roughly 3 inches wide so it does not wrap around the arm. On totes and bags, measure the flat panel and stay clear of seams and handles.
Common sizing mistakes
- Using one big size for every shirt. It fits the XL and swallows the youth small.
- Placing the print too low. A full-front design should start a few inches below the collar, not in the middle of the stomach.
- Ignoring the garment style. Ladies' cuts, V-necks and quarter zips have less flat space than a classic tee.
- Forgetting the zipper or pocket. Hoodie pockets and zippers cut into the print area, so measure above them.
Getting your art ready
- Set the canvas to the final print size. If you want a 10 inch wide print, set the file to 10 inches wide.
- Use 300 DPI. A low-resolution file will look soft or pixelated when printed at size.
- Transparent background. Send a PNG with no background box unless you want the box printed.
- Thicken thin lines. Very thin strokes and tiny text may not hold up. Aim for lines at least about 1 point thick and text at least 6 to 8 points.
- Remove stray pixels. Leftover specks around the art will print as dots.
Pressing your transfers
Once your transfers arrive, press them with our flexible formula: 290°F for 15 seconds, 315°F for 5 to 8 seconds, or 325°F for 5 seconds, with medium to full pressure. Higher heat needs less time. Cre8tee transfers are hot peel. Run a test on a spare garment first. More fabric tips are covered in our Apparel Guides.
Ordering from Cre8tee
We make our own DTF transfers. The max print width is 10.5 inches, and turnaround is currently 3 to 4 days. We are not taking rush orders right now. If you would rather have us print the finished shirts, see bulk orders.
Frequently asked questions
What size DTF transfer is best for a T-shirt front?
For adult shirts, 9 to 10.5 inches wide is a common full-front size. For a left chest logo, sizes range from about 1 to 4 inches wide. Smaller looks better on most shirts, and 4 inches is best saved for very large shirts, such as a 5XL.
What is the standard left chest DTF size?
Left chest logos usually range from about 1 to 4 inches wide. DTF holds fine detail, so a smaller logo often looks better than the 3.5 inch size many people expect. A 3.5 x 3.5 logo on a medium shirt is usually too big. Save a 4 inch width for very large shirts, such as a 5XL.
What is the largest DTF transfer Cre8tee makes?
Our max print width is 10.5 inches.
Should youth shirts get a smaller transfer?
Usually, yes. A 7 to 8 inch wide design tends to fit youth shirts better than a full adult-size print.
What size DTF transfer fits a hat?
Most hat fronts take a design about 2 to 4.5 inches wide and 2 to 2.5 inches tall, depending on the hat style.