How to Press DTF Transfers: Step-by-Step
Pressing a DTF transfer is simple once you know three numbers: temperature, time and pressure. Get those right for your fabric, peel the film while it is still hot, and finish with a post press. We make our own DTF transfers at Cre8tee, so this guide starts with the settings for our transfers, then walks through every step, including how to use a household iron, how to press DTF on hats, fixes for common problems, and care tips that keep prints looking new.
Pressing a Cre8tee DTF transfer? Our formula is flexible: higher heat needs less time, and lower heat needs more. Use 290°F for 15 seconds, 315°F for 5 to 8 seconds, or 325°F for 5 seconds, with medium to full pressure. 315°F for 5 to 8 seconds is our everyday setting, and 290°F for 15 seconds is best for polyester. Cre8tee transfers are hot peel, so peel the film while it is still hot. Run a test press on a spare garment first.
Important: the settings in this guide are for Cre8tee transfers. Films, adhesive powders and inks vary, so if your transfers came from another supplier, follow their instructions first and use this guide to fill in the gaps.
What you need to press DTF transfers
- A heat press (clamshell, swing away or a hat press for caps). A household iron works in a pinch, see the iron section below.
- Your DTF transfers, trimmed with a small border around the design
- A Teflon sheet or parchment paper to cover the film
- A plain shirt for a textured, matte post press (optional)
- Heat-resistant tape to hold the transfer in place
- A lint roller
- A ruler or T-square for placement
- A heat press pillow or foam pad for seams, zippers and hoodie pockets (optional but helpful)
Heat press settings for Cre8tee DTF transfers
Our transfer formula is flexible: higher heat needs less time, and lower heat needs more. Any setting in this range works:
| Heat | Time | When to use it |
|---|---|---|
| 290°F | 15 seconds | Low temp option for polyester, performance and other heat sensitive shirts |
| 315°F | 5 to 8 seconds | Our everyday setting, the one we use most |
| 325°F | 5 seconds | Top of the range, shortest press |
Use medium to full pressure. Cre8tee transfers are hot peel, so peel the film while it is still hot. If your press runs hot or cold, check it with a temperature gun before a big run.
Settings by fabric
| Fabric | Heat and time | Pressure | Notes |
|---|---|---|---|
| 100% cotton | 315°F for 5 to 8 seconds | Medium to full | The most forgiving fabric for DTF. 325°F for 5 seconds also works. |
| 50/50 cotton and poly blends | 315°F for 5 to 8 seconds | Medium to full | Watch for dye migration on dark heather blends, and test first. |
| Tri-blend | 290°F for 15 seconds | Medium to full | Use the low end of the range to avoid shiny press marks. |
| 100% polyester and performance wear | 290°F for 15 seconds | Medium to full | Lower heat cuts the risk of dye migration and shine. Test dark and bright colors first. |
| Fleece and hoodies | 315°F for 5 to 8 seconds | Medium to full | Use a pressing pillow to get past seams and pockets. |
| Canvas and tote bags | 315°F for 5 to 8 seconds | Medium to full | Make sure the print area sits flat and gets even contact. |
How to check your pressure
Pressure is the setting people get wrong most often. Slide a sheet of printer paper under the upper platen, close the press and try to pull the paper out. If it slides out easily, increase the pressure. If you cannot close the press without forcing it, back it off. Medium to full, even pressure across the whole design is the goal.
How to press DTF transfers step by step
Step 1: Preheat and set your press
Set a Cre8tee setting from the table above. 315°F for 5 to 8 seconds is our everyday setting. Use 290°F for 15 seconds on polyester, performance shirts and tri-blends. Give the press a few minutes to reach a steady temperature.
Step 2: Prep the garment
Lint roll the print area, then pre-press the garment for 3 to 5 seconds. This removes moisture and wrinkles so the adhesive bonds evenly. Let it cool for a few seconds before you place the transfer.
Step 3: Position the transfer
Place the transfer ink side down on the garment with the clear film facing up. For a standard adult front print, a common starting point is about 3 to 4 inches below the collar, centered side to side. Fold the shirt in half to find the center line, or use a T-square. Tape the corners with heat-resistant tape so the film cannot shift.
Step 4: Cover and press
Cover the transfer with a Teflon sheet or parchment paper and press at a setting from the table with medium to full pressure. Keep the press closed for the full time. Do not open it early to check.
Step 5: Peel the film
Cre8tee transfers are hot peel, so peel the film while it is still hot. Peel low and slow, at a sharp angle, keeping the film close to the garment. If the design starts to lift with the film, stop, lay it back down and press again for a few seconds, then peel hot again.
Step 6: Post press to set the finish
For a front only print, give it a post press after you peel:
- Glossy finish: post press with a Teflon sheet over the print.
- Soft, textured, matte look: post press with a plain shirt over the print instead of Teflon.
For a front and back print, only the back needs a post press. Press the front, then the back. Pressing the back transfer re-seals the front, so the front is already set.
Step 7: Let it cure
Let the garment cool completely and wait about 24 hours before the first wash. That gives the adhesive time to fully set.
How to peel a Cre8tee DTF transfer
Cre8tee transfers are hot peel. Peel within a few seconds of opening the press, while the film is still hot. Peel low and slow, keeping the film close to the shirt. If you are pressing transfers from another supplier, follow their peel instructions instead.
How to apply DTF transfers with a household iron
A heat press gives the most consistent results, but you can apply DTF transfers with an iron for a one-off shirt or a quick fix. Expect a little less durability than a press, so the finishing step matters even more.
- Turn off the steam and empty the water. Set the iron to the cotton setting, usually the highest heat.
- Work on a hard, flat, heat-safe surface like a wooden cutting board covered with a pillowcase. An ironing board is too soft and flexes under pressure.
- Pre-iron the garment for a few seconds to remove moisture and wrinkles.
- Place the transfer, tape it down and cover it with parchment paper or a Teflon sheet.
- Press down hard with both hands, using your body weight. Hold each section for 15 to 20 seconds, then lift and move. Do not slide the iron. Cover the whole design, with extra time on the edges.
- Peel hot if you are pressing a Cre8tee transfer. If any edge lifts, cover and press that area again, then peel hot.
- Finish with a post press: Teflon for a glossy finish, or a plain shirt instead of Teflon for a soft, textured, matte look.
The steam holes on most irons leave cooler spots, so overlap your presses and give small designs extra time. Larger designs are harder to press evenly with an iron.
How to press DTF transfers on hats
DTF works well on many caps, and a single transfer is a practical choice for small hat runs. The key is getting even pressure on a curved surface.
What you need for hats
- A hat press with a curved upper platen and a matching lower form, or a small heat press with a hat pillow
- Heat-resistant tape
- A Teflon cover sheet or parchment
Hat press settings
For Cre8tee transfers, start with 290°F for 15 seconds and medium to full pressure, then test on a spare cap first. The lower heat is a good starting point on a curved, often heat sensitive front panel.
Tips for pressing caps
- Trim the transfer close to the design so the film sits flat on the curve.
- Pull the front panel tight over the hat form and tape the transfer on all sides.
- On structured caps, press in two or three short presses from the center out, rolling the cap slightly between presses.
- Avoid pressing over the center seam if you can. If the design crosses it, make sure the seam gets even contact.
- Mesh trucker backs are fine, but the front panel needs to be a solid fabric for the adhesive to grab.
- Cre8tee transfers are hot peel, so peel the film while it is still hot, low and slow.
DTF troubleshooting guide
| Problem | Likely cause | How to fix it |
|---|---|---|
| Film will not release or ink stays on the film | Peeled after the film cooled, or not enough heat or pressure | Lay it back down, press again with medium to full pressure, and peel hot while the film is still hot |
| Edges lifting after peel | Low pressure or short press time | Cover and repress for a few seconds with medium to full pressure |
| Print cracks after washing | Underpressed, no post press or washed too soon | Use the full time and medium to full pressure, add the post press and wait 24 hours to wash |
| Shiny or plastic look | Too much heat or a glossy cover sheet | Use the low end of the range (290°F for 15 seconds) and post press with a plain shirt for a soft, textured, matte look |
| Ghost image or double outline | Film shifted when the press opened or during peel | Tape all corners and open the press smoothly |
| Color bleeding on polyester | Dye migration from the fabric | Use 290°F for 15 seconds and test on a spare garment |
| Scorch marks or press box lines | Temperature too high or no cover sheet | Use a lower heat setting, a cover sheet and a pressing pillow |
| Uneven adhesion on hoodies | Seams, zippers or pockets blocking pressure | Use a pressing pillow so the print area sits higher than the seams |
How to wash and care for DTF printed shirts
A well pressed DTF print can last 75+ washes when you care for it the right way.
- Wait about 24 hours after pressing before the first wash.
- Wash inside out in cold or warm water with a mild detergent.
- Skip bleach and fabric softener.
- Avoid high dryer heat. Tumble dry low or hang dry.
- Do not iron directly on the print. If you need to, iron inside out or use parchment.
Our DTF transfers
We make our own DTF transfers, and you can order them on our DTF transfers page.
- Turnaround: currently 3 to 4 days. We are not offering rush orders right now.
- Max print width: 10.5 inches.
- Our press settings: 290°F for 15 seconds, 315°F for 5 to 8 seconds, or 325°F for 5 seconds, with medium to full pressure. Higher heat needs less time. Cre8tee transfers are hot peel.
Common transfer sizes we can make
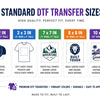
| Size (width x height) | Common use |
|---|---|
| 4 x 2 in | Hat fronts, sleeves and small logos |
| 5 x 4 in | Left chest and pocket logos |
| 7 x 7 in | Youth fronts and back neck or yoke prints |
| 8 x 8 in | Youth and small adult fronts |
Need a different size? We can make transfers up to 10.5 inches wide. Ask on our DTF transfers page.
DTF transfer FAQ
What temperature do you press DTF transfers at?
Anywhere from 290°F for 15 seconds up to 325°F for 5 seconds, with medium to full pressure. Higher heat needs less time. 315°F for 5 to 8 seconds is our everyday setting, and 290°F for 15 seconds is best for polyester. Peel hot. Run a test press before a full order.
How do I peel a Cre8tee DTF transfer?
Cre8tee transfers are hot peel, so peel the film while it is still hot. Peel low and slow, keeping the film close to the shirt. If the ink starts to lift, lay the film back down, press again for a few seconds and peel hot again.
Can you apply DTF transfers with a household iron?
Yes. Turn off the steam, use the cotton setting and press on a hard, flat surface instead of an ironing board. Use body weight, hold each section for 15 to 20 seconds and do not slide the iron. Peel hot, then finish with a post press. A heat press still gives the most even, durable results.
How long do DTF transfers last?
A properly pressed DTF print can last 75+ washes. The biggest factors are the right heat, time and medium to full pressure, a post press, and good care. Wait 24 hours before the first wash, wash the garment inside out and avoid high dryer heat. Those simple habits keep colors bright and edges from lifting.
Can you press DTF transfers on polyester?
Yes. DTF works well on polyester and performance wear. With Cre8tee transfers, use 290°F for 15 seconds and medium to full pressure. Too much heat can pull dye from the fabric into the print, called dye migration. Test on a spare garment first, especially with dark or brightly colored polyester.
Can you put DTF transfers on hats?
Yes. Use a hat press or a heat press with a hat pillow so the curved front panel gets even pressure. Trim the transfer close to the design, tape it on all sides and press in short sections from the center out. For Cre8tee transfers, start with 290°F for 15 seconds and medium to full pressure, then peel hot.
How long does it take to get DTF transfers from Cre8tee?
Turnaround is currently 3 to 4 days. We are not offering rush orders right now.
What is the largest DTF transfer you can make?
We can make DTF transfers up to 10.5 inches wide. Common sizes include 4 x 2, 5 x 4, 7 x 7 and 8 x 8 inches.
Need DTF transfers or custom shirts?
Cre8tee has been in business since 2011, and our founder has been printing since 2002. We are based in Collegeville, PA, and we make our own DTF transfers.
- Need DTF transfers? Order our DTF transfers on our DTF transfers page.
- Ordering shirts for a team, school or business? See our bulk orders page.
- Running a tournament or event? Browse event and tournament apparel or learn about tournament booking.
- Have a question? Contact us and we will help you out.
More printing tips are in our Apparel Guides.